How to Cross a Ditch While Off-Roading
10 Steps For Crossing a Ditch - Trench - Fosse
Contents
- Introduction
- General Guide to Crossing a Ditch – Trench – Fosse
- 10 Steps to Cross a Ditch - Trench - Fosse
Introduction
Have you ever had to cross a ditch or been stuck in a ditch?
Keep reading to ensure you can safely maneuver around a ditch or mound.
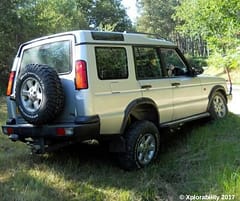
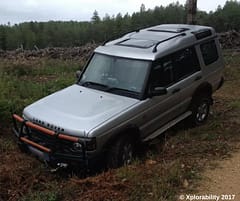
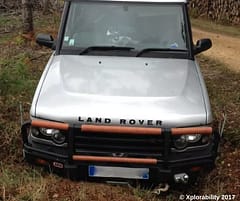
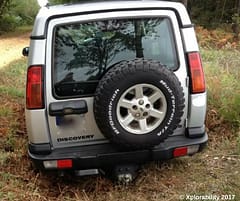
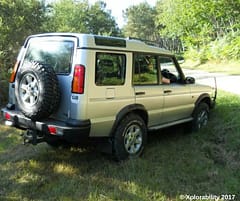
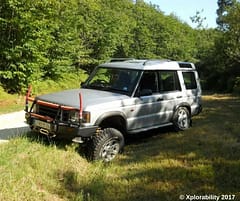
This content was developed by and owned by Paul Sinkinson, Xplorability owner. Paul is a 4wd Defensive Driver Training Consultant/Trainer and Programme Developer.
Before venturing out to areas known with ditches take the time to read all the Training Guides listed below. You need to understand your vehicles size limitations and capabilities to ensure you are able to negotiate mounds and ditches.
General Guide to Crossing a Ditch – Trench – Fosse
Before you start:
-
Do you understand the operational controls of your Vehicle and Transmission with regard to the Traction Control (TC) and Central Differential Lock (CDL) IF Fitted.
-
Are you fully aware of your Vehicle’s Geometric Limitations? Do you understand the Angles of Approach, Departure and the Ramp Angle and how this may affect you when crossing this type of obstacle?
Preparation for Ditch Crossing
-
Engage LOW RANGE
-
If you have the Central Differential Lock (CDL) engage this also.
-
Regardless of whether a Manual or an Automatic, engage 2nd Gear in the LOW RANGE GEARBOX. The reason for this is that in the Manual, First gear may be too low and create too much wheel-spin and damage the terrain which may make crossing the obstacle harder. In the Automatic, with the Gear Lever in D2, it will commence in 1st Gear BUT change as required into 2nd Gear if required which in turn reduces wheel-spin.
-
If you have air suspension it is best to lift it up to Maximum height before crossing a ditch.
If you have a Land Rover Discovery 2 you can read more about your air suspension system here. Below is a quick guide on how to use D2 suspension for crossing a ditch.
-
If you have rear air suspension locate the Rear “Lift” operating button but do not operate it to start with as if you do, as the rear rises the front end goes down accordingly which means you reduce the Front Bumper/Fender Ground Clearance. WAIT until the FRONT wheels are totally clear of the Ditch and then press the button and lift the suspension at the rear as it will assist with 4 inch (100mm) extra ground clearance for the rear Bumper/Fender as the rear wheels enter the ditch. Don’t forget to reset it to standard when you are clear of the obstacle.
-
If you also have the extra “PLIP” Button setup for Lowering the rear air suspension you could lower the rear which will lift the front slightly for extra clearance before you enter the ditch. Don’t forget to reset it and raise it before the rear wheels enter the Ditch otherwise you will ground out.
If you have to cross a Ditch…
It is a good idea to inspect it first on foot and consider your vehicle’s Geometric Limitations. If you don’t do that you may well finish up stuck or hung up on the chassis or low slung parts.
Well, now you’ve viewed the obstacle and you have decided that it is passable with your vehicle and your experience how do you undertake this.
If you followed the earlier 4wd Training Files you should already have an understanding of the transmission systems. You’ve looked at the obstacle. So you try and drive through it.
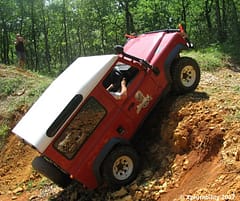
Usually, the first error drivers make is to drive straight into the ditch at right angles to its line. Why is this an error?
If you drive straight into a ditch in attempt to cross it you are committing the front axle and wheels into the ditch. When you do this, depending on the depth and the approach angle of your vehicle you are likely to now have the front bumper/fender embedded in the far face of the ditch. On top of that, both front wheels and the axle are now in the bottom of the ditch and all the weight is on them. You can not drive forwards and possibly because the rear of the vehicle is now lighter with all the weight on the front wheels, you may not have traction to reverse out.
You are NOW possibly STUCK in the trench unable to move forwards nor backwards.
IF you were lucky and you actually managed to drive the vehicle’s front wheels forwards straight over the trench and the front bumper/fender did not touch the far side and your front wheels managed to drive you through, there is now a likelihood that as you progress and commit the rear wheels and axle into the ditch that the rear chassis frame, fuel tank or the rear bumper/ fender will become caught up on the back edge of the ditch as the rear wheels descend into it. WHY? Because the Departure Angle at the rear of the vehicle is not as great as that of the Approach Angle – Remember the Geometric Limitations File mentioned earlier.
The weight will also have now transferred to the rear of the vehicle so although the front wheels are out on the far side of the ditch because they have little weight on them they may not have sufficient traction to drag you through and or, IF they were capable of doing so the rear of your vehicle may suffer damage due to the down force on the terrain. Because you have limited traction on the front wheels you may also be unable to reverse out.
IF you are fortunate enough to have the Rear AIR SUSPENSION on your Discovery 2 or other 4wd vehicle you may however be in LUCK…..
In a Disco 2 by pressing the Lift Button on the dash panel you can raise the rear of the vehicle up to 4 inches (100mm) which may offer you sufficient clearance. If not, you are likely to be stuck and require careful recovery to avoid damage.

SO, HOW DO YOU CROSS A DITCH/TRENCH/FOSSE?????
10 Steps to Cross a Ditch - Trench - Fosse
It all comes back to those Geometric Limitations plus basic Geometry combined with your Discovery 2’s Axle/Suspension Articulation.
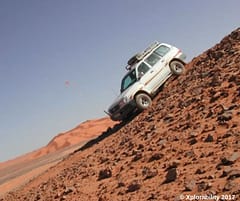
Basically, IF you approach the Ditch/Trench at an angle of around 45 degrees rather than straight on at 90 degrees you will have a better chance of crossing the obstacle because of a number of things.
-
Because of the 45 degree angle you will only be committing one wheel on the front axle at a time into the ditch. This means you still have 3 wheels on good level ground to provide traction.
-
As the first front wheel enters the ditch, only one side of the front bumper/fender will be anywhere near the far edge of the ditch and therefore be less likely to become blocked.
-
As the vehicle progresses forwards, the first wheel into the ditch will now start to climb the far side of it it will clear the front bumper/fender due to the angle and possibly before the other front wheel is entering the ditch. As it climbs out of the ditch you will still now have 3 wheels on good terrain as the second front wheel drops into the hole.
-
As the second wheel moves and climbs out the other side it too clears that side bumper and you now have all 4 wheels on good ground.
-
As you now move forwards, the first wheel of the rear axle now descends into the ditch and the vehicle and subject to how good your suspension is the vehicle may tilt slightly and subject to the depth of the ditch you may find that the opposing front wheel may lift off the ground. Although alarming, this is normal.
- Again, as the vehicle moves forwards that wheel will now start to climb so you still have 3 wheels on good ground as the next rear wheel enters the ditch. This now is the “critical” point because as the last rear wheel drops in, the rear end chassis and or rear bumper/fender may touch the back edge of the ditch before the last wheel climbs the front of the ditch.
-
IF YOU DO HAVE REAR AIR SUSPENSION THEN RAISE IT BEFORE YOU LOWER ANY OF THE REAR WHEELS INTO THE DITCH. This will give you more clearance and save becoming hung up.
-
You do need to practice ditch/Trench/Fosse crossings to gain a fuller knowledge and understand the principles.
-
Once you are back on level ground – Check around the vehicle and then if you engaged CDL disengage it as required (subject to terrain and onward route etc.) If you raised the rear air suspension drop it back down again.
-
NOTE: A Mound or Hump on the Track is really a Ditch the other way up so use the same 45 Degree Approach Method.
Previous Article: Guidelines to Driving on Snow and Ice
Next Article: Rough and Rocky Tracks
Check out other work by Paul, fiction thriller novels here.
Copyright
This content was prepared for the Off-Road Discovery Website by Xplorability 4wd Training
The Content - All Photographs and Photographic Copyright and All other Rights other Reserved October 2017. S.W. France. This content may not be copied or reproduced without the written consent of Paul Sinkinson – Xplorability Training.
For Use Only in 4wd and Light Vehicle Driver Training.
Not for Re-Publication, Distribution or use outside the Xplorability Training Programme
You may also like …