Land Rover Discovery 2 Rear Tire Carrier Replacement & Upgrades
How to remove the rear door panel, remove and re-attach spare tire carrier
Contents
Introduction
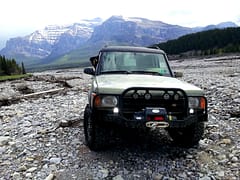
Our original Land Rover Discovery 2 (2001) spare tire carrier snapped a bolt when changing from summer to winter tires. 2 out of 3 bolts seemed less than ideal so we decided to UPGRADE. We choose a Terrafirma which seems like way more solid quality than the original, though the original did last 22 years.

For step by step instruction plus tips the video is likely the best resource…
If you can’t watch a video right now here’s the how to:
- Remove the tire on your carrier
- The inside back panel needs to be removed from the rear door
- Unscrew the speaker and remove from the door, there is a clip you need to press and release to get the speaker unattached from the door
- Unscreen the door handle and any other screws you see
- Ideally you have an panel popping tool which helps pry the inside panel off the door.
- Remove panel and keep all your screws and items somewhere safe so you can easily put it back together
- We purchased a Terrafirm part Tf499
- The holes didn’t line up perfectly so we had to file the Land Rover to make it fit. The Terrafirma is so thick it seemed harder to try to adjust that metal
- We did not use the metal pieces that were behind the original tire carrier the Terrafirm seems strong enough and the bolts didn’t go through far enough
- Attach the carrier with the bolts
- Have some extra plugs on hand to re-attach the back panel you likely will break a few, you don’t need a plug in every spot but you want there to be enough to be mostly full.
- When you put the back panel back on gently hit the edges to make sure all the plugs go back in
- Attach your spare tire and enjoy being done this job!