Land Rover Overland External Modifications and Add-ons
Our Adventure Mobile Set-up
Contents
- Introduction
- ARB Awning
- Ladder and RotopaX
- Trasharoo
- Hi-Lift Jack
- Roof Top Tent
- Shovel
- Previous external upgrades we made:
Introduction
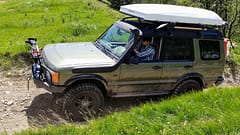
We have recently added some additions to the exterior of our Land Rover and love them! Modifications and additions to a vehicle are personal and vary for need and personal taste. We get pretty excited when we find things that make our life easier and make us happy so we want to share our add-ons in case it helps you find what you’re looking for. Within a very short period of time we added a High Lift Jack, ARB Awning, iKamper Roof Top Tent, Ladder, Shovel, Fuel and H20 Rotopax canisters.
ARB Awning
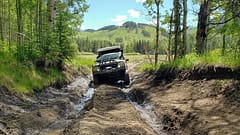
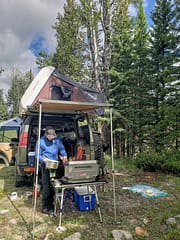
We decided to put our ARB awning at the rear of our Land Rover. We often leave the back door open camping and use the rear as shelving while cooking. With an awning at the back and the door open we have a small covered space with great access to the vehicle, with a small tarp added to the non-door side we have a cozy little ‘kitchen’ in bad weather.
With our iKamper brackets we had to figure out how to attach the ARB awning. We decided to not get the iKamper annex beacuse it’s so large and we didn’t want a fully enclosed space nor did we want to store the annex. We also didn’t want to sacrifice the speed to open and close our iKamper which keeps overland flexible. Update: we did get the Annex in the future when we started putting it on the Sequoia, however we rarely have used the annex and wouldn’t purchase again if we went back to tell ourselves.
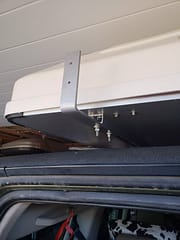
We have the iKamper anti-theft locks which frees up two of the original iKamper attachments that we were able to retrofit with brackets that we had made.
We decided to create L brackets that could be bolted to the iKamper with their original hardware then attach the ARB awning to the L bracket. We couldn’t find any L brackets that would work from hardware stores so we went to a local machine shop in Calgary, Alberta, Aaron’s Machine Shop to have them create the brackets we needed out of ¼” thick steel and then we drilled mounting holes.
L brackets attached to iKamper
ARB Awning Kitchen
Ladder and RotopaX
We needed to carry more fuel and water which meant we needed a container system that connected to our vehicle somehow. Having come across friends that had make-shift systems and then seeing the RotopaX fluid storage system, it seemed like a much more durable and secure option. To mount a RotopaX meant we needed some type of bar on the outside of our Land Rover Discovery 2 with enough space to install the brackets. Since we have maxed out our roof rack with our iKamper, shovel attachment and ARB awning, we needed to create a new location. Our best idea was installing a ladder on the rear door of our Disco 2. We ordered a Disco 2 specific OEM replica from Brit Parts. Installation was fairly simple requiring use/purchase of a new tool, threaded insert rivet tool. This tool was not easy to find (locally and didn’t want to wait to ship) NOTE: Make sure you buy the correct hardware (SI vs Metric).
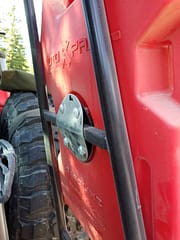
With the ladder installed, mounting the RotopaX adapter plate required a little ingenuity in the form of a rear circular electrical box plate. We marked four holes on the plate to match the adapter and were drilled and filed to accept carriage bolts. Once the RotopaX is attached and locked with the RotopaX lock this ‘system’ cannot be stolen as the bolts can’t be accessed.
Self made attachment for RotopaX on an exterior ladder
Trasharoo
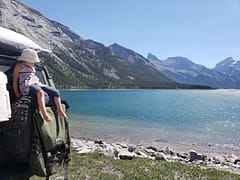
Why didn’t we have this when our kids were in diapers!!! Keep the garbage and recycling outside the vehicle with one of these. Due to bears and cougars in our area depending on what’s in our garbage we still need to store a small bag in the vehicle at night. We have also used the Trasharoo to hold extra items when not using as a garbage bag. The Trasheroo still works with our hitch mounted Bike Rack and can hold some of the rack accessories in the multiple external pockets when not being used. Simple yet so handy!
Hi-Lift Jack
I seriously hope to never use the hi-lift jack, but it’s kinda like getting insurance.
We have had a friend stranded meters from a quiet highway in no cell range who in most circumstances would have prepared and even owns a Hi-Lift jack but didn’t have it on him. A scruffy man covered in mud in the middle of nowhere at dusk waving for help does not have many people stop to help, thankfully one kind couple did, after waiting a very very long time. This situation sold us on a Hi-Lift Jack and making sure we actually carry it! Our friend wasn’t even a crazy off-roading situation that one would think a Hi-Lift jack would be required but it was.
We are out of cell range the majority of our adventures and have a In-Reach Satellite (our review of this product) device to call Search and Rescue if needed. This sometimes feels extreme especially if we are “stuck”. We would use the device if needed but would rather have more options to actually help us be self-sufficient.
We bought a Hi-Lift jack, mounted it with clamps to our bumper and presto we have a different tool to use for back-up if needed.
Roof Top Tent
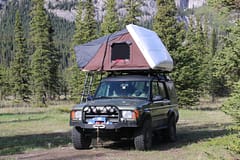
This summer (2018) we purchased a iKamper Skycamp roof top tent. We have always been tenters but found the set up and take down took longer than we wanted. Then one random youtube video showed us the iKamper, a little more research and we were sold! It fits our family of four comfortably and will be good for 4 adults as well. Our full review and thoughts on the iKamper can be found in our iKamper Roof Top Tent post. We’ve been on some serious 4x4 trips with lots of washboard and side to side movements for days and still no visible issues with rack holding iKamper or iKamper itself.
Shovel
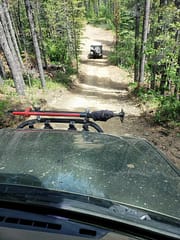
We attached a good ol’ fashion wood and metal shovel to the roof rack of the Land Rover using clamps. We attached Quick Fist clamps to the Thule cross bars with a pair of Thule clamp mounts. The Thule clips seem to be a weak point and shake loose a bit after repeated vibration but can be easily tightened. We had a small shovel but when you actually need to dig yourself out a big one is way better on the back and to reach right under the vehicle. The shovel is also used for making our backcountry ‘outhouses’.
